If you’ve been shopping for window bars, you’ve probably noticed something frustrating: the bars themselves can look “affordable,” but the moment you ask for professional installation, the price jumps fast. That’s because the real cost driver in most quotes isn’t the metal—it’s labor, scheduling, and the “contractor tax” that stacks per window.
That’s exactly why DIY window bar installation has become the smartest home security move for 2026. When you remove labor from the equation, you don’t just save money—you gain speed, control, and consistency. You can secure the first window today, then repeat the same process across the rest of the home, instead of waiting weeks for an installer.
And the savings are real. Many homeowners see professional window bar installation land in a broad total range of roughly $725 to $1,750 per project, with an average around $940, while labor alone commonly averages about $150 per window. (Angi) When you multiply that labor line across multiple ground-floor windows, DIY window bar installation turns into a strategy—not a weekend hobby.
This guide breaks down the cost math, why professional installs are expensive (without pretending contractors are villains), and how a modular telescopic system like Security Window Bars (SWB) can be installed in about 15 minutes per window for many standard openings—without welding, custom fabrication, or permanent structural compromises. We’ll also cover life safety: if a window is part of your emergency escape plan, you need an egress-ready approach (like SWB Model A/EXIT) so security never becomes a trap.
Most homeowners don’t mind paying for materials. What hurts is paying for the same labor repeatedly—window after window—plus the overhead that comes with scheduling, travel, liability, and “problem solving” when the home isn’t perfectly standard.
DIY window bar installation changes the math because it cuts out the most repeatable, compounding line item: labor. On many jobs, the labor charge isn’t a single flat price—it scales with every window, every complication, and every additional visit.
Let’s put it in plain numbers.
• If labor averages about $150 per window, then:
– 3 windows = ~$450 labor
– 5 windows = ~$750 labor
– 8 windows = ~$1,200 labor
– 10 windows = ~$1,500 labor
That’s before materials, before any removal work, and before any upgrades for masonry surfaces or oversized openings. And that’s the core reason DIY window bar installation can save up to $1,750 in many real-world project scenarios. (Angi)
Why “Save Up to $1,750” is a realistic headline (not a gimmick)
The key word is “up to.” Not every home hits the maximum. But many homes do hit the conditions that push professional pricing upward:
• Multiple vulnerable windows on the first floor
• A finished basement with several openings
• Windows set into masonry, stucco, or deep recesses
• Oversized openings where installers need extra time or a second person
• Removal of old bars or damaged security screens
When you remove labor and scheduling overhead, you don’t just shave off a small percentage—you often erase a huge chunk of the total.
DIY window bar installation also creates a “budget unlock.” Instead of saving for months to do all windows at once, you can secure the most vulnerable windows first, then expand as you go.
The “security timing” advantage
There’s a second savings most people don’t price correctly: time.
If a professional install takes weeks to schedule, you’re paying in risk. Vulnerable windows remain vulnerable. DIY window bar installation can close that gap immediately. In home security, timing is part of the cost.
A lot of homeowners think: “It’s just drilling. Why is it so expensive?”
The honest answer: traditional window bars were never designed for homeowner self-installation. They were designed for fabrication-style installs—meaning skilled labor, custom sizing, and the ability to improvise on-site.
Contractors aren’t “overcharging” simply because they can. They’re pricing what the job actually requires:
• Measuring visits and estimate time
• Travel and scheduling overhead
• Insurance and liability
• Surface complexity (wood vs. brick vs. stucco)
• Anchoring decisions (and responsibility if something fails)
• Removal of old hardware or damaged bars
• Custom sizing, cutting, welding, repainting, and finishing (for traditional ironwork)
Angi notes labor can average around $150 per window for professional window bars, and removal of existing bars can add cost as well—commonly around $70 per window in some projects. (Angi)
So no—professional installation isn’t automatically a ripoff. The issue is that older product designs force you into labor-heavy workflows.
DIY window bar installation works when the product is engineered to remove labor from the equation.
Where your pro cost actually goes (a homeowner-friendly breakdown)
Think of a professional install quote as four layers:
Layer 1: The product
Layer 2: The install labor (per window)
Layer 3: The overhead (travel, scheduling, insurance, admin)
Layer 4: The uncertainty premium (weird frames, uneven surfaces, masonry surprises)
DIY window bar installation compresses layers 2–4 dramatically—especially if the system is modular and telescopic.
Why modular engineering changes everything
A modular telescopic system changes the job from:
“Custom metalwork and installer improvisation”
TO
“Measure → configure → mount → repeat.”
That repeatability is the difference between “I tried DIY and it was a disaster” and “I installed five windows in one afternoon and it looks professional.”
Even if you never touch an interactive tool, you can calculate the core savings in 60 seconds. DIY window bar installation savings usually comes from three places:
A) Labor you don’t pay
B) Scheduling overhead you avoid
C) Future change costs you reduce (because modular systems are easier to adjust, remove, or reconfigure)
Use this simple formula:
Estimated labor savings = (number of windows) × (labor cost per window)
Using the $150 per window reference: (Angi)
• 5 windows × $150 = $750
• 8 windows × $150 = $1,200
• 10 windows × $150 = $1,500
Now add removal (if it applies)
If old bars need to be removed and a contractor charges around $70 per window, removal alone can add hundreds. (Angi)
Estimated removal add-on = (windows) × (removal per window)
Example: 8 windows × $70 = $560 removal
DIY window bar installation can save the install labor—and sometimes allows you to handle removal gradually (or avoid it altogether if you’re switching systems in stages).
A practical “project range” example (how totals get to $725–$1,750)
Scenario 1: Small project (3–4 windows)
• Labor: ~$150 per window = $450–$600
• Removal: optional
• Total installed project can quickly land near the ~$725–$1,000 range depending on bar type and window conditions (Angi)
Scenario 2: Medium project (5–7 windows)
• Labor: $750–$1,050
• Add overhead + complexity and it’s easy to push toward the higher end of common totals (Angi)
Scenario 3: Larger first-floor hardening (8–10 windows)
• Labor alone can approach $1,200–$1,500
• With removal or masonry complexity, you can see why “up to $1,750” becomes realistic (Angi)
DIY window bar installation is basically a way to keep your budget focused on hardware instead of repeatable labor charges.
Most DIY failures happen for one reason: the bars were not built for DIY.
Traditional fixed iron bars are unforgiving. They require precision fabrication. If your measurement is slightly off, you can’t “adjust”—you have to cut or redo. That’s why many homeowners give up.
DIY window bar installation becomes realistic when the product design removes the two biggest barriers:
Telescopic vertical adjustment (fit without cutting)
A telescopic system can be adjusted to match window height without cutting metal. That’s a huge deal, because height is where most old-school installs become fabrication work.
Instead of forcing a homeowner into:
“Measure perfectly or you’re stuck,”
Telescopic adjustment allows:
“Measure carefully, then fine-tune the fit.”
That makes DIY window bar installation repeatable across multiple windows, even when the home has small variations between openings.
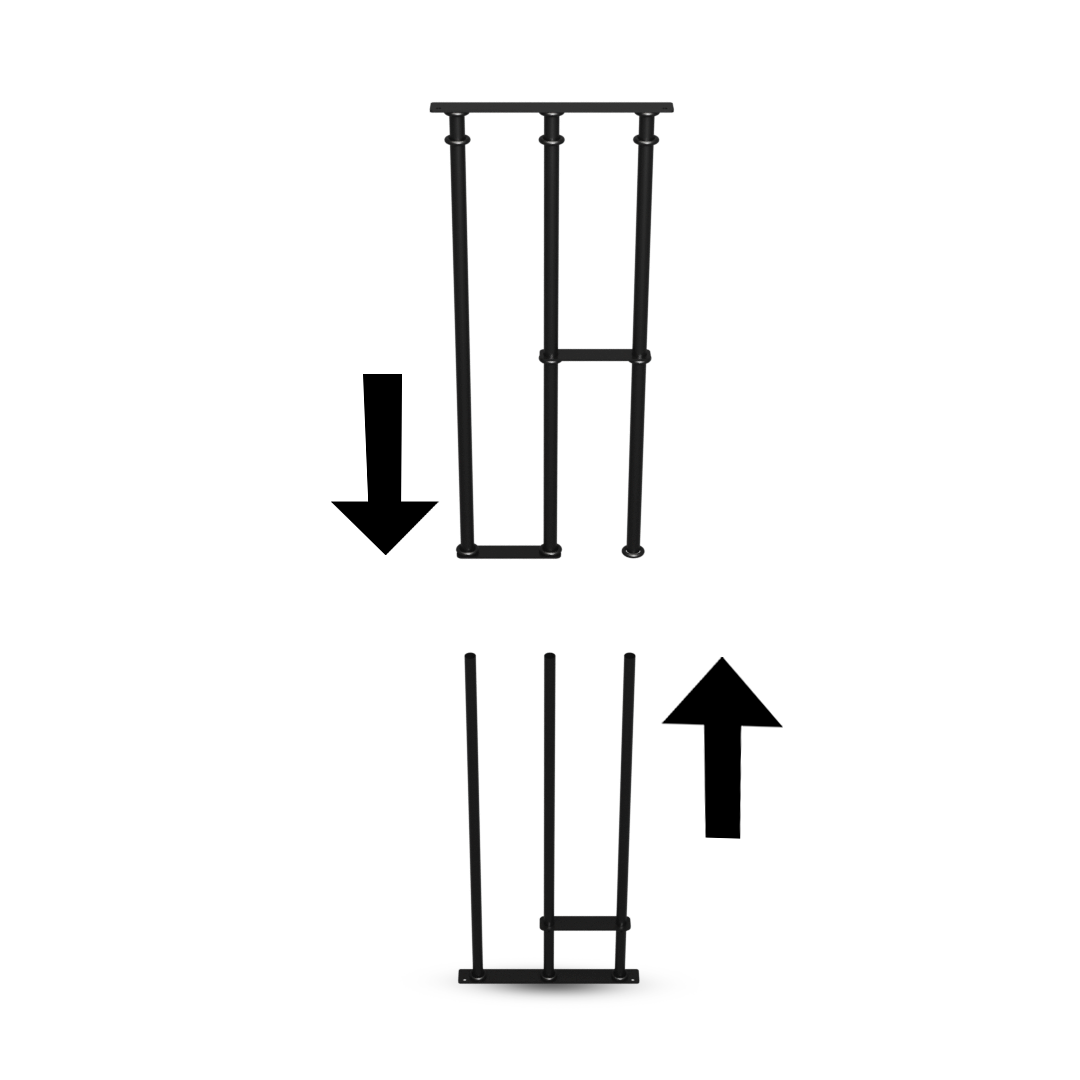
Modular horizontal expansion (cover width without custom metalwork)
Homes have every type of width:
• narrow bathroom windows
• wide living room openings
• basement windows
• sliders and oversized frames
A modular system turns width into a configuration choice instead of a welding job. You expand coverage by adding modules, not by fabricating a one-off piece.
This matters because a large percentage of professional costs come from custom work. Modular systems reduce the custom problem.
The “normal homeowner tool” reality
DIY window bar installation works when the tool list matches what homeowners actually own. Many modern systems can be installed with:
• drill + bits
• measuring tape
• level
• pencil/marker
• safety glasses
You shouldn’t need a metal shop to secure a window.
The repeatability principle (why window #2 is faster than window #1)
Your first install teaches you the process:
• measure
• align
• mark
• pre-drill
• mount
• test
Once you’ve done that once, the rest becomes a repeatable pattern. That repeatability is where the time savings come from. For many homeowners, DIY window bar installation isn’t one project—it’s a system rollout.
The debate isn’t “DIY good, contractors bad.”
The real question is: what is the best return on your money and time?
Here’s a practical comparison.
Cost
Professional installation often includes labor around $150 per window, plus project totals that commonly land in the $725–$1,750 range, with an average around $940. (Angi) DIY window bar installation removes much of that labor cost.
Speed
Professional installs require scheduling, lead times, and sometimes multiple visits. DIY window bar installation can happen the same day you receive the product.
Flexibility
Traditional fixed bars can be hard to remove or adjust. Modular systems can be easier to reconfigure—especially useful for:
• rentals
• renovations
• future window upgrades
• changing security needs (new tenant, new neighborhood reality, etc.)
Life safety
In egress-sensitive rooms (bedrooms, finished basements), DIY window bar installation must be done with egress thinking. A quick-release approach exists for a reason: security must not block escape.
This is the part most homeowners want: a clear, no-drama process.
Important: the exact steps can vary based on mount type and wall material. But the logic stays consistent.
Before you drill: the 90-second setup that prevents 90% of mistakes
Tools checklist
• power drill
• appropriate drill bits (wood/masonry depending on surface)
• measuring tape
• level (or phone level)
• pencil/marker
• safety glasses
• screwdriver/driver bit set
Mindset checklist
• measure the structure, not the glass
• don’t eyeball alignment—mark it
• pre-drill when needed
• anchor into real structure
• if egress applies, test release operation from inside
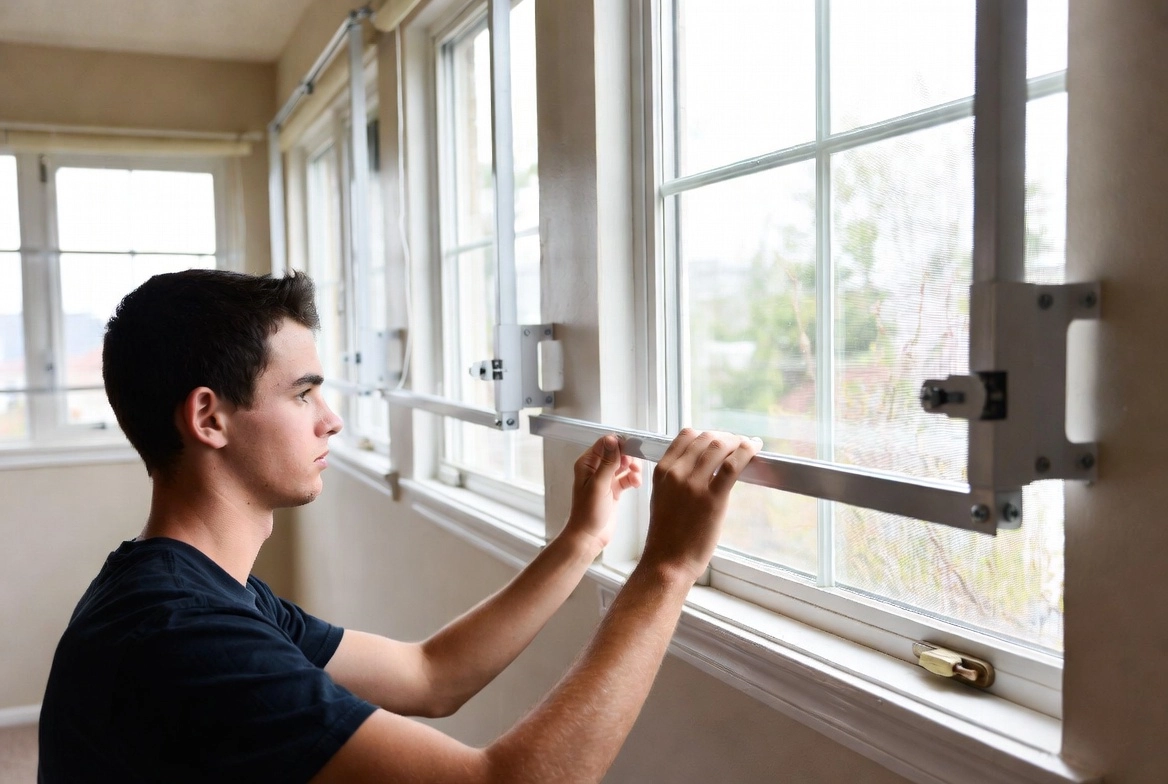
Step-by-step DIY window bar installation sequence
Step 1: Measure the clear opening (not the glass)
Measure the real mounting area where the bars will be installed. “Clear opening” means the structural space you’re securing—typically inside the frame area, not the visible glass.
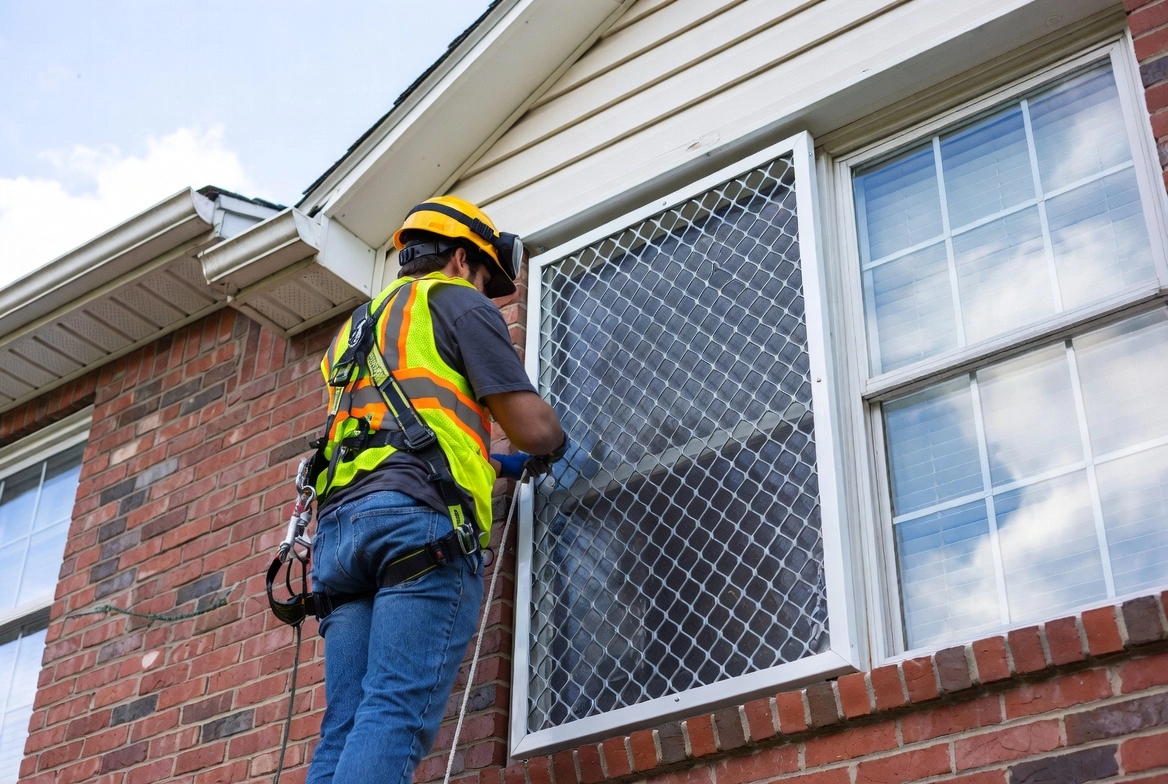
Step 2: Decide your mount strategy: frame-mount vs wall-mount
Frame-mount: often used when the frame is solid and square
Wall-mount: often used for masonry, stucco, or uneven surfaces
The goal is structural anchoring. Decorative trim is not structure.
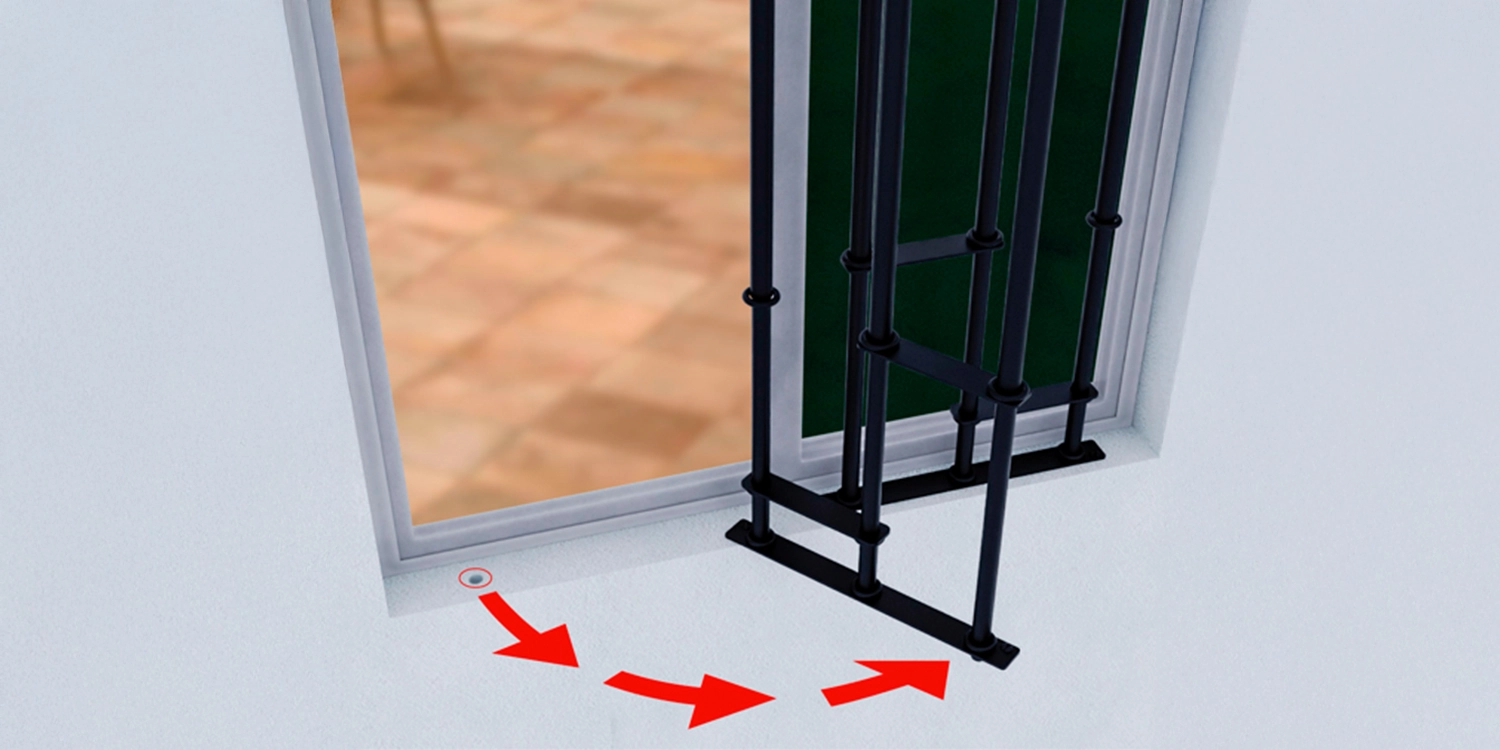
Step 3: Configure the system for your opening
With telescopic and modular designs, configuration is where DIY window bar installation wins. You set the height, then plan the width coverage through modules.
Step 4: Dry-fit in position and level it
Hold the assembly in place, check level, and confirm the alignment looks intentional—not crooked, not jammed, not forcing the frame.
Step 5: Mark drill points precisely
Mark the holes while the assembly is aligned. This is the moment that determines whether the final result looks professional.
Step 6: Pre-drill pilot holes (especially on hard surfaces)
Pilot holes reduce screw stripping, protect the surface, and help the fastener seat straight.
Step 7: Drive the security fasteners and confirm rigidity
Install the tamper-resistant fasteners. Then test movement. The bars should feel solid—no rattles, no wiggle.
Step 8: If using an egress-ready model (like Model A/EXIT), test the release from the inside
Open and close it multiple times. Confirm every adult in the home can operate it quickly—without hunting for a key, tool, or instructions.
The “15-minute per window” reality
For many standard windows, the time target is realistic once you understand the sequence—especially after your first install. The first window may take longer. Then your speed increases as the process becomes repeatable.
DIY window bar installation is not about rushing. It’s about removing unnecessary complexity through engineered design.
Bad measurements create ugly installs—and ugly installs often lead to wasted money. The most common DIY window bar installation error is measuring the wrong thing.
What to measure
• clear opening width: the structural side-to-side space where bars will mount
• clear opening height: the structural top-to-bottom space where bars will mount
• surface material: wood, metal frame, brick, concrete, stucco (affects drill bits/anchors)
What not to measure (unless your mount plan requires it)
• decorative casing that can’t hold anchors
• the glass pane size
• exterior trim that is not structural
The “two measurement” method (a pro trick)
Take width in two places:
• top of opening
• bottom of opening
Take height in two places:
• left side
• right side
Homes are not always perfectly square. If you find differences, you plan around the tighter dimension and mount into structure.
Why measurement is where DIY window bar installation either wins or fails
If you measure correctly, modular/telescopic systems reward you with clean fit. If you measure poorly, you can create gaps, misalignment, or weak anchoring.
Measuring is not the “boring part.” It’s the job.
This section is non-negotiable.
If a window is required as an emergency escape and rescue opening, bars or grilles generally must be releasable or removable from the inside without the use of a key, tool, or special knowledge. (Reddit)
That’s why quick-release concepts exist. DIY window bar installation must protect against intruders without turning a bedroom into a cage.
The safe homeowner rule
If a room is used for sleeping—or if a basement is finished and used as living space—treat it as egress-sensitive unless your local authority says otherwise.
This isn’t about fear. It’s about being responsible.
How egress-ready options solve the dilemma
An egress-ready design (like SWB Model A/EXIT) is built around the principle that:
• secure from the outside
• releasable from the inside
• no key needed in an emergency
• no tools needed in an emergency
• no “special knowledge” required when adrenaline is high
If you need security and an escape route, DIY window bar installation should include an egress-ready plan for those specific rooms.
Practical egress checklist (for homeowners)
• Identify sleeping rooms and finished basement rooms
• Identify which window is intended as the escape opening
• If bars cover that window, use a releasable solution
• Practice the release—repeatedly
• Teach every adult in the home
Security is only “complete” when it includes escape.
DIY window bar installation saves money only if you don’t pay twice—once for your DIY attempt and again for a repair or redo.
Here are the most common mistakes that cause rework:
Mistake #1: Skipping pilot holes
This leads to stripped screws, crooked fasteners, cracked surfaces, and weak anchoring. Pilot holes are a 60-second insurance policy.
Mistake #2: Mounting to weak trim
Decorative trim is not structure. Anchors must bite into something solid. If you mount to a weak surface, you can create a false sense of security.
Mistake #3: Rushing alignment
Crooked bars look cheap and can create weird gaps. Mark drill points carefully while the assembly is level.
Mistake #4: Using the wrong bit/anchor for masonry
If your surface is brick or concrete, treat it like brick or concrete. Wrong bits burn time and ruin holes.
Mistake #5: Ignoring egress logic
Installing fixed bars in egress-required rooms can create safety and compliance problems. The point of DIY window bar installation is not only savings—it’s smart security.
Quality metric: what a “good install” feels like
After DIY window bar installation, the bars should feel:
• rigid
• aligned
• intentionally mounted
• stable under pressure
• free of rattles and movement
If it feels questionable, it is questionable.
If labor averages around $150 per window, five windows can mean about $750 in labor savings alone—and larger projects can push savings higher. Typical installed project costs can land around $725–$1,750, with an average around $940, depending on complexity and window count, which is why removing labor can create big savings. (Angi)
Most homeowners can complete DIY window bar installation with a drill, measuring tape, a level, marking tools, and safety glasses. The goal of a modular system is “normal homeowner tools,” not metal fabrication equipment.
Security depends on three things: (1) material quality, (2) anchoring quality, and (3) correct installation. A properly anchored steel system is a serious deterrent. Many intruders avoid loud, time-consuming barriers. DIY window bar installation can be extremely secure when the product is engineered for repeatable mounting and you anchor into structure.
If the window is part of a required emergency escape and rescue opening (common in sleeping rooms and habitable basements), bars generally must be releasable or removable from the inside without a key, tool, or special knowledge. (Reddit) When in doubt, treat the room as egress-sensitive until local guidance confirms otherwise.
Removal depends on how the bars are attached and your surface material. Some projects add removal cost around $70 per window when hired out. (Angi) If you’re replacing old welded bars, modular systems can reduce future removal and reconfiguration costs because they’re built for repeatable mounting.
Many homeowners can hit a ~15-minute per window target on straightforward openings once they’ve completed the first install. The first window often takes longer because you’re learning the sequence. Then the process becomes repeatable.
Cameras help you see what happens. Alarms help you react. Window bars help prevent entry in the first place. Many homeowners use all three: deterrence + detection + response. DIY window bar installation is one of the few upgrades that can deliver strong deterrence without recurring monthly fees.
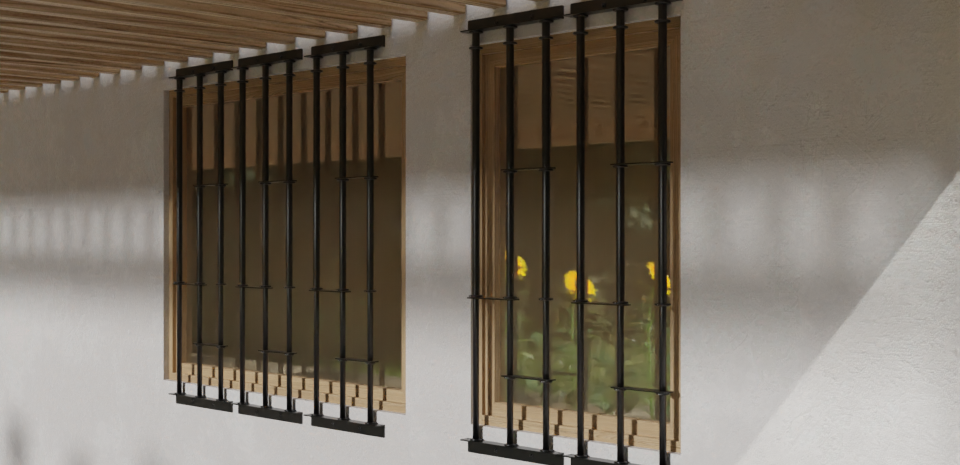
Bad installs can. Clean installs usually don’t—especially if the bars look intentional and fit the home’s style. If you’re concerned about aesthetics, focus on alignment, symmetry, and consistent module spacing.
DIY window bar installation is the engineering-first way to harden a home: you keep your money, you move faster, and you avoid being trapped by schedules.
Use this checklist to make sure your install is secure, clean, and responsible.
Before you install
• Measure clear opening width + height (structure, not glass)
• Decide mount type: frame vs wall (structure matters)
• Identify first-floor vulnerable windows
• Identify egress-sensitive rooms (sleeping areas, finished basements)
• If egress applies, choose a releasable/quick-release approach
• Gather tools and confirm drill bits match your surface material
During installation
• Dry-fit and level the bars before drilling
• Mark drill points carefully
• Pre-drill pilot holes when needed
• Anchor into solid structure
• Tighten fasteners fully and test rigidity
After you install
• Check for movement (no rattles, no wiggle)
• Confirm fasteners are seated and tamper-resistant
• If egress-ready: practice opening from inside repeatedly
• Document your measurements/config so future windows are easier
Conclusion: Empowerment Through Engineering
Security doesn’t have to be a luxury reserved for homeowners who can afford contractors. With a modular, telescopic system, DIY window bar installation becomes the smart path: engineered protection, fast setup, and real savings—without compromising life safety.
If you want to maximize speed and accuracy, your best next step is to plan your configuration (module count + fit strategy), then repeat the same DIY window bar installation sequence across your most vulnerable windows first.
COOKIES POLICY
Security Window Bars LLC ("SWB") uses cookies and similar technologies to improve your browsing experience and enhance the functionality of our website www.securitywb.com (the “Website”). This Cookies Policy explains what cookies are, how we use them, and how you can manage your cookie preferences.
By using our Website, you agree to our use of cookies as described in this policy.
Last Updated: 01/01/25